Thursday, October 27, 2016

Is it a "road block" or a "speed bump"?

That's one of the questions I ask myself to determine how to deal with my UFQ's!
"Road block" or "speed bump"?
It's almost that time of the year again when I take stock of my UFQ's and try to decide what to do about them.  I've made great progress over the past 4 years but not the progress I envisioned.

It's time for me to ask the question again -- at what point did I stop working on this project?
And hopefully that will lead me to a list that will give me a clue about "why" I stopped.
Then the trick is to decide if the "why" is a "speed bump" or a "road block"!!
Think about it.  
Speed bumps are annoying, they slow us down when we want to go faster, but they don't stop us.
Road blocks on the other hand are different -- we can't get through them for one reason or the other and if we're lucky someone will tell us where the detour is.

At my peak (?), I owned 72 finished quilt tops ready to be quilted.  It wasn't enough to just know how many there were (yikes), I needed to determine the WHY? behind that stack -- okay, those stacks.

My first excuse was that I don't like to layer quilts by myself. 
I'm capable of doing it certainly -- after all I've taught quilters how to layer their quilts for close to 30 years.
So this is just a speed bump for me -- it slows me down because I have to whine and fuss prior to engaging in the process. 
Good news is that I found a strategy or two that has helped this part of the quilt making process become less odious.  One is to ask for help and the other is to layer two or three at a time because the "hardest" part of the process is starting.

Help isn't always available and so I marked the center of my "layering" table -- who knew such a small thing could be such a big help?
My layering table is an adjustable height folding table with a hard plastic surface.
I set it up in the living room so I can watch TV and layer -- time passes enjoyably and I'm distracted from the "odious" task at hand.   As long as it's up right now, I'm going to cut out a blouse this evening to stitch up next week.
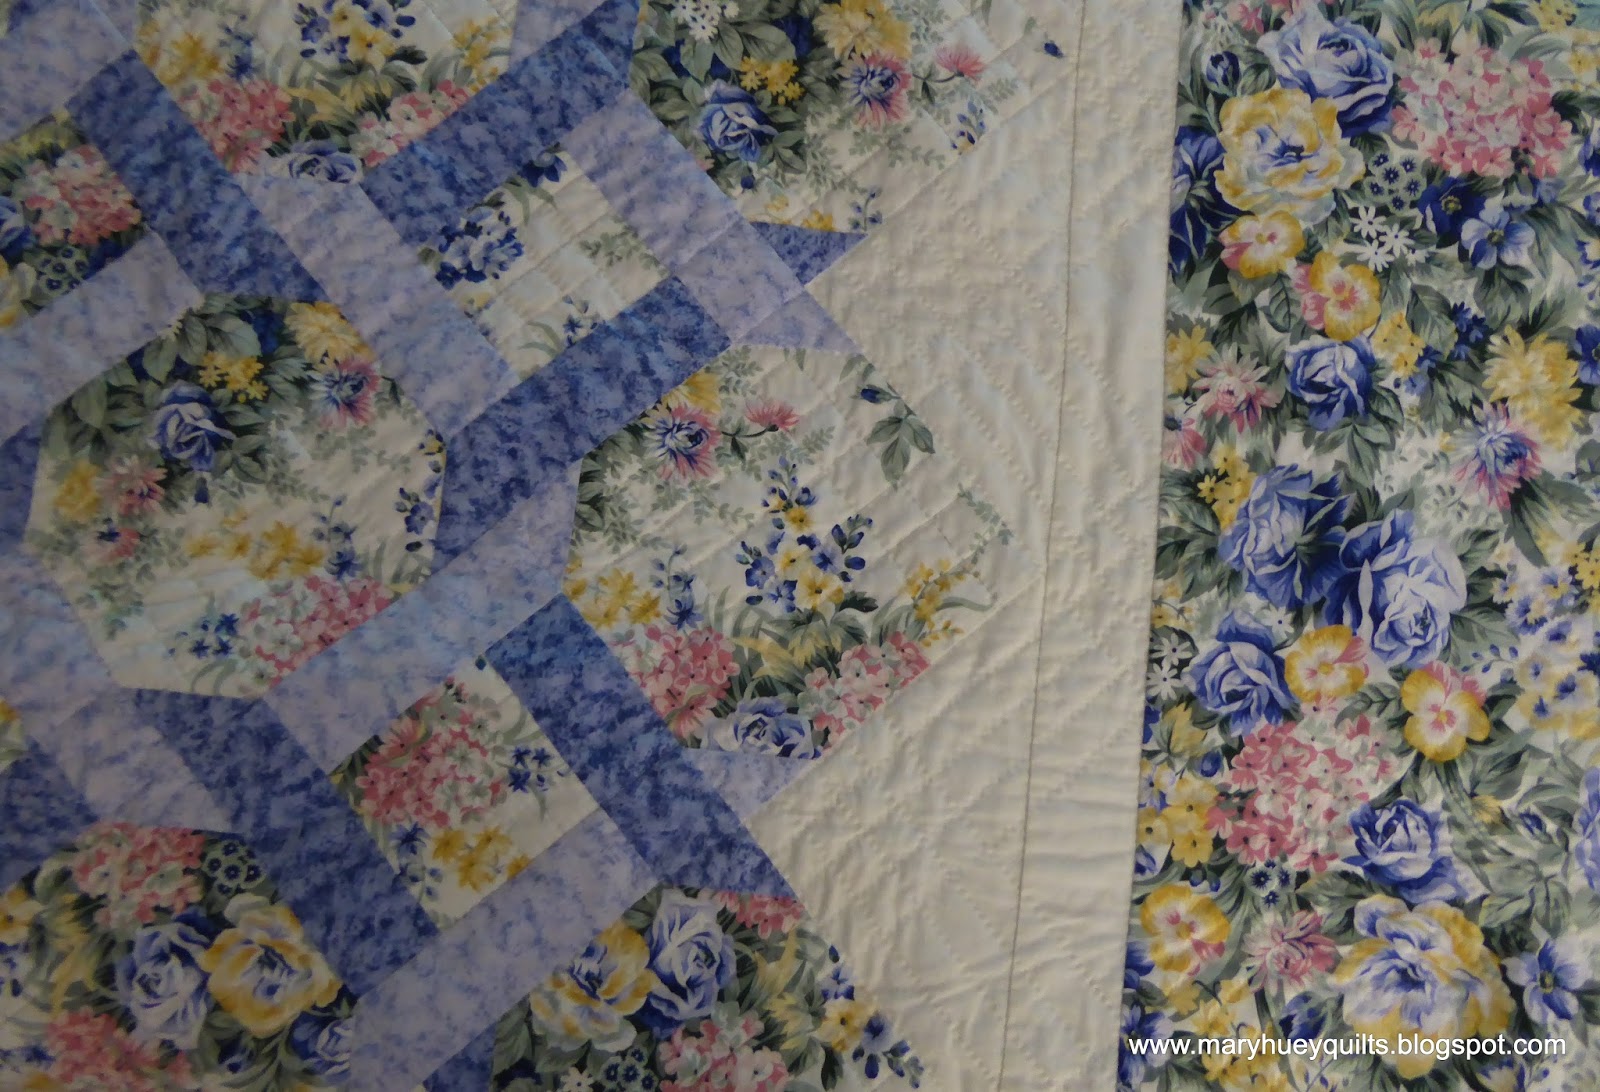
I layered this quilt yesterday afternoon while watching a new episode of Midsommer Murders!!
There's another small quilt that I'll layer before taking the table down for the weekend.
For the most part, I've eliminated this speed bump that kept me from finishing quilts on a regular basis!!

Then there is the "road block" issue.
How to actually quilt a top?
I'm talking about mental paralysis here!
I would just stare at a layered piece for days and try to figure out what to do.
What I have decided is that there were two issues -- first I don't believe I can "visualize" the end result and second, I didn't have enough experience to be confident about my quilting.

Since I teach quilt making professionally, I feel it's important for me to be able to discuss the "how to quilt it" question with students so I'm more inclined to quilt my own pieces rather than to send them to a professional quilter.  So over the past 5 years, I have worked hard to find alternative routes to get the quilting done myself!!

Since small quilts are easier to do myself, I've turned to doing the quilting in "sections" (or quilt-as-you-go) for my large pieces.  The first one I did was terrifying -- layered up the four sections and looked at it for a full six months before I actually started the stitching. 
Now it doesn't intimidate me as you can see in this POST.
Marti Michell's Machine Quilting in Sections is my "bible" for this process.  Between the alternative finishing ideas and the 14 reviews of quilts finished using this approach, I always find the help I need!  (Marti has a Craftsy Class on this topic.) 


BIG STITCH hand quilting has also provided an enjoyable alternative to finishing some of my quilts.  I enjoy hand stitching in the evening while watching TV and "big stitch" is a stress free approach.  There are lots of tutorials and youtube videos about the process -- I just found this one on the Auribuzz blog which has great step-by-step pictures.  I love the look of it for my "funky" stuff!  If you haven't tried it, go with a small project like a pillow cover and see what you think.

Finally, I've quit following the quilting escapades of professional long arm quilters!
They do beautiful work and it's really inspiring but it intimidates me. 
I don't have the patience or interest in spending hours creating detailed quilting designs.
I want to piece, piece, piece!!
So I now look to "modern" quilters for my quilting inspiration.
They tend to have a simpler utilitarian approach and I can do that!!
 The results of these three strategies are beginning to have a positive impact.  My pile of tops is dwindling steadily.  I'm not sure I've removed the "road block" but I've found three good alternate routes. 
I still get off to a hesitant start, but I'm realizing that quilting more quilts is making it easier to find solutions to that big question, "How should I quilt this?"

I'm betting some of you have struggled with this aspect of making a quilt.  I hope you'll share your strategy for "just doing it" with the rest of my readers in the comments section!

Have a stitching good time this weekend!

Mary


Monday, October 24, 2016

Fourth Quarter 2016 Finish Along -- First Finish!

Between lots of extra walks in the woods to enjoy fall in Northeast Ohio, I managed to cross the first finish off my fourth quarter 2016 Finish Along list.   
Wild grapes growing up through a sassafras tree

It involved finishing a quilt pieced and almost finished by our church organist's wife who passed away last winter.  He found it while going through her things and brought it to me to see what needed to be done to finish it and if I would do it.  On first look, it seemed to just need the binding but it wasn't long before I discovered that the borders were not quilted -- more work than I had anticipated for sure!
And she had hand quilted it.  I only hand quilt for myself, no one else.
Plus the quilt was much bigger than I typically make -- 92" by 108" -- with a heavier batting than I use.  After a conversation with Jim, it was agreed that I could machine quilt the borders -- whew!!
There was some procrastinating brought on by the size and weight of the quilt -- it engulfed my machine table completely!  But in the end, it went more smoothly than I was anticipating.  It was an advantage that I only had the borders to do.

I did a simple design in the white setting triangles -- the quilting of the interior of the quilt is simple cross hatching.   
I stayed with the simple theme for the border -- straight lines perpendicular to the edge.  As you can see the quilting disappears into the fabric.  It would have been good practice with a fancier design but the idea of wrestling with the bulk of the quilt discouraged that idea. 
In the end, it took about 8 hours to add the quilting.   The quilt pattern is called Trellis and was designed by In The Beginning fabrics for this fabric . . . or was it the other way around?
Here it is folded in quarters and centered on my double bed -- it's huge!!
I have to smile when I see quilters neatly folding or rolling the binding -- as you can see I don't do that -- just a pile on the floor to my right.
I stitched the binding completely by machine and it took two hours to wrestle it around -- bonus was that I had to clean off my machine table before I started! 
And here it is.  Folded up and ready to take to Jim on Sunday morning. 
The delivery didn't illicit much of a reaction other than to ask if he could bring the "other one" next Sunday. 
 Other one?!?
How do we get ourselves into these obligations?

Hope you have some stitching time every day this week!!

Mary


Friday, October 21, 2016

Pattern Testing!!

This summer, while following Anneliese (at Eye Candy Quilts) Smorgasblocks project on Instagram, I became acquainted with Jess at Threaded Quilting.  The Smorgasblocks project began HERE with her paper pieced 12" feathered star pattern.  About a month ago, she began to post pictures of a new set of larger feathered stars made with NO paper-piecing.  Last week, she posted a request for pattern testers to stitch one of the two sizes included in her soon to be released Fierce Feathered Star.  I responded and the next morning, I was choosing fabric for a test run of the 36" block!!
After reading, okay skimming, through the instructions, I picked a feature print for the center block and pulled fabrics from my stash to complement it.  The cutting instructions are set up with numbered shapes and space to make color notations which I find saves me lots of mental energy and eliminates confusion.
It took me about 2 hours to choose the fabrics and getting the cutting finished -- ready for stitching the next day!
This was my first experience with this technique for HST's -- I've always used a preprinted triangle paper which stabilizes the fabric and eliminates this crinkling.  I was a bit alarmed at first but a good pressing flattened everything out and the cutting went just fine.  Another time, I would give the two fabrics for this step a Best Press treatment before cutting the basic squares.  I think that would eliminate this crinkling!
I didn't tell Jess this, but I'm not an HST trimming fan!!
But my job was to test her pattern, not adapt it to my own preferences.  So I soldiered on!
You'll notice I went from handling one at a time to laying out 3 at a time for some mass processing.
One of the trickiest parts of getting a good feathered star pattern is sizing these triangles.
Frankly, I don't know of any manufactured templates (my typical approach) that would have achieved the right size for this pattern. 
I also took the time to stitch an extra line before trimming the stitch and flip corners so I have sixteen of these HST units for the scrap box.
With the HST's and star points finished, it was time to assemble the star!!
I have to confess, this is not my first feathered star.  I have taught it almost annually over the last 10 years with Marti Michell's template sets so I know the potential pitfalls.
Look closely at Figure 16 (upper right) and compare that to my four corner units.
Going too fast, twisted something around (not once, but all four times) -- out came the ripper!
There is only one way to assemble this unit and mine version wasn't it!!
For the second feather strip, I double checked my layout with the diagram and assembled them correctly (the first time).  I haven't seen the final draft of the pattern yet, but I suggested to Jess that she add the word "exactly" and perhaps an underline to emphasize the importance of both reading and using the photos of these steps.
Two stitching sessions (about 3 hours total) and I had a finished 36" block. 
My plan is to expand it a bit on the top and bottom to make a 40" by 54" child's quilt which I'll donate as a Christmas gift to a local transistional home for young women working to turn their lives around.
Jess introduced her pattern Wednesday and you can purchase it HERE.  It comes as a downloadable PDF so you can get to work instantly -- love that about PDF's. (Part of the test was to be sure it printed accurately and so I learned to select "actual size" to assure that -- who knew??)  The pattern also includes a 20" block which a friend of Jess's is offering as a kit for a Christmas version of the block HERE.

It's reassuring to know that a pattern writer is testing her instructions.  I've written enough instructions to know that what makes perfect sense to me doesn't always ring clear with another person.  I found the instructions to be thorough and complete . . . . you do need to read all the words not just look at the pictures . . . . and then you need to pay attention to the orientation of things in the pictures!! 

I love the size of it and can visualize four of them set up with some large scale sashing in modern fabrics for a stunning modern quilt!

Let me know if you give the pattern a try!!

For those of you in Northeast Ohio -- the second Mutton Hill Quilt Show is Saturday, 10/22 and Sunday 10/23 in Akron, Ohio -- all the info is HERE.  My version of SMITTEN is hanging out there and I'll be there on Sunday afternoon!

Mary


Monday, October 17, 2016

Running out of steam -- Morris Hexathon

There are only two blocks left to go in Barbara Brackman's Morris Hexathon and I'm now three blocks behind.  But I have an excellent reason?!
I can't cut any of the pieces for them with my templates.  )-:
And two of the three involve applique -- I can do it, I'm just not confident enough about it to work in such a small scale and I'm hesitant to get involved with the extra seams at some of the intersections .
If I decide I need a full 26 blocks, I may just make a couple duplicates of my favorite blocks or find some interesting variations.
 
I did make #22 Hyde Park -- H53 and N78 work together for this one!
I used N73c to measure the width of the strip for the small diamonds and then referred back to an earlier post (HERE) to refresh my mind on how to cut small diamonds with this template -- so glad I shared that idea with you so it doesn't get lost.  The sixth picture down from the top in that post was the one I needed.
This is the backside of N78 and you'll notice that I don't take off all the paper when I start using a template -- it's a great anti-skid surface!!  I needed a half hexagon and added my own line to the paper to cut those.
H53 has a dashed line down the center and I used it to line up my template on this stripe for the large diamonds.  I folded the strip in half wrong sides together -- it's an uneven stripe and doing this enables me to create crisp, clean chevrons at the center of the star as you'll see in the following pictures.
Making the three piece units for the outer edge of the block is just like piecing tumbling block units!  Start at the outside edges, stitch to the center dot, and pivot out. 
Here are the outer edge units ready to insert in the three star segments.  I always make 6-pointed stars this way -- the results are so much better for me than making two half-stars. 
You can read my explanation of how I do it HERE in a post from my Diamond Star Playtime series. 
Here are the three completed segments ready to set together into the star. 
The star is ready for the final three outer units. 
And here it is, Hyde Park star.  I like this block and intend to use it in a larger size for a future quilt. 
At this point, it often takes me longer to pick out the fabric than it does to piece the block using the set-in simplified technique featured on my DVD.  It's now been just over four years since Mary O'Keefe shared her idea with me in a set-in piecing workshop and what a blessing it has been to my piecing!!
 
Here are my twenty-one finished blocks in no particular order.
What do you think?
I really like all the stars, not so crazy about some of the simpler blocks -- they look clunky but Barbara doesn't intend for them to sit edge to edge like this.
At the very least, they will make a great teaching tool during my expanded workshop this winter!
 
Keep on piecing!!
 
Mary


Tuesday, October 11, 2016

UFQ Assault Tactics

One of my most popular and long running guild lecture programs is UFQ (unfinished quilts) Assault Tactics.  I created this program after I closed my shop, Erie Street Quilts, in 2005.  Since I'd spent 26 years helping customers start UFQ's, it seemed only right that I should turn my attention to helping them finish them.  This fall I'm presenting the lecture several times and so it's much on my mind and I thought some of my readers might find my ideas useful, too. 

Over the past decade, I've seen more and more teachers and guilds turn their attention to the piles and piles of UFQ's that lurk in everyone's stitching lives.  My ideas comes from my own efforts to whittle away at my own piles so I guess you could say they have been tested for viability?   And based on the occasional feedback I get from quilters, they work for others as well. 

Many times, I've heard quilters say things like "I'm not starting any new projects until I finish all my old ones".  Quilters don't smile when they make that statement and it's one that always makes me cringe -- it takes all the fun and excitement out of being a quilt maker.  It sounds like quilting suicide to me.  Better to finish one before you start one -- at least then you'll stay even.

A more productive approach is to reframe your definition of UFQ and view them as a "resource" rather than the "burden" that they can be.  When defined as a "resource", it gives each one new potential and possibilities and increases their value in your mind. 
Makes working on them feel less like housework and more like creative play!!

Each UFQ now has the possibility to become the starting point for a gift, or a donation, or a way to raise some extra cash for a vacation or to invest in new fabric!?!

Let me share three examples with you from my own work.

One of my favorite tactics to getting a UFQ finished is to go with what I have and get it finished. 

How many of you have this popular BOM project started -- it's from the 90's?  I only pieced one of the blocks in the first place (my Friendship group pals made the other 11) but between slogging through the embroidery and applique details and being unhappy with my large center pieced square, it laid on the shelves for years. 
Finally, I gave in and settled for fewer details and no central square -- you can read more about this finish HERE.  I love this quilt and it hangs in my dining room every spring.
This is the photo of a fabric line model that I made for a company around 2003 -- the fabric designer designed the pattern and I made it and wrote the instructions.  My staff and I finished one and started a second to use in the shop.  The second came home in a box unfinished when I closed in 2005.
Two years ago, I went with what was pieced and created this little crib sized quilt to donate to our annual Christmas gift project.  The guilt of stumbling across this pile of pieces and fabric is now gone (yeaaa!!) and BONUS, I still have all that gorgeous large print with the swallows in my stash!! 
 
How about this BOM?  I still love this quilt but I only started it. 
And I love this quilt, but I only bought the pattern book and a fabric kit. 
Happily, the two piles collided in this masterpiece which I love even more and it's finished!  I shared the story of it's creation HERE.  BONUS -- I sold the set of BOM chicken patterns and the Japanese book that had the basket sampler pattern to benefit my vacation fund!!  
The moral of the story -- you can still create a great quilt with fewer blocks and a different arrangement of the blocks you were able to get made.  Eliminate elements of a project that are holding you back, consolidate projects that have compatible colors and fabric styles.  Do whatever it takes to get that UFQ off the shelves and onto a bed or a wall!!  You will not be punished for doing it "your way" and you'll make some creative discoveries along the way that will have a positive impact on your future quilt making!! 
 
If your guild is interested in booking this lecture in the future, have your program chair person get in touch with me!
 
Let's have fun with those UFQ's!!
 
Mary

Saturday, October 8, 2016

2016 Finish Along -- 4th Quarter Goals

Does it seem like we were just worrying about beginning a new century and here we are almost finished with the 16th year of it?!?

The final part of any year is busy isn't it -- with the change of seasons and holiday preparations there is lots of work to be done around my home.  So I've decided to keep my quilting goals simple for this final quarter of 2016 knowing that new ideas and projects will pop up of their own accord at this time of the year.

This vintage top from the last quarter's list is still on the list.  I know where it's destined to go but every time I pull it out I can feel my brain clutching about "how to quilt" it.  Need to engage the "just do it" mantra and get moving on it!!
The most pressing (and perhaps the simplest) goal for the quarter is to make a baby crib using this stack of farm themed prints for a friend's third grandson.  I am under the impression that his mom has a soft spot for farm animals (and I hope I'm right!!), so I thought this would be fun.  I'm planning to use Marti Michell's Tessellated Windmill tool to cut and piece this quilt. 
This lap size top is made from a "jelly roll" assortment from my own stash and I'd like to have it ready for some winter cuddling in my living room.  I pieced it at a winter retreat almost 2 years ago (HERE).  The chicken plates on the right is the backing fabric which I can't bring myself to cut up, so a backing it is!! 
This trellis quilt was pieced and hand quilted by our church's organist's wife.  She passed away last winter and he found this quilt "ready to bind" in a closet this fall.  "Sure I can do that!"  And I can but when I unfolded it, I discovered the border isn't quilted.  It's a huge quilt and I'm not going to finish the hand quilting.  I'm going to add machine quilting to it and then bind it for him.
Finally, I'm going to finish these two English paper pieced projects into throw pillows for my living room.  The top one is from Nellie's Niceties (an Etsy shop) -- Wafers -- and I'm combining batiks and Kaffe Fassett prints.    I think this one will be round.
The second one is the leftovers from the neck roll pillow I made earlier this year (HERE) -- think it will be a rectangle.  Together the three pillows will move me closer to a completed living room rework! 
It's very tempting to go back up to the studio and pull out a couple more pieces to finish this quarter but, but, but I'm holding myself back!!
How about you?  Are you setting goals and stepping up to a challenge?
You can check out the growing number of "to finish" lists at the linky HERE!!

Have a stitching weekend!!

Mary